Blog – Success Dogs
11

How To Stop A Dog From Jumping Up

Jumping is a problem that a lot of pet parents deal with. Dogs jump for a couple of reasons. One reason is because the dog is excited. Another reason is because the behavior has a reinforcement history. And one other reason is because our faces omit a lot of smells and the dog wants to get a good whiff.

Stopping Your Dog From Jumping on You:

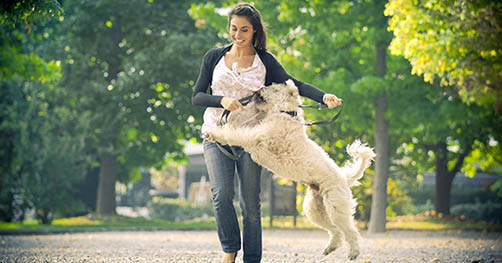
A lot of people get home after a long day of work and get jumped on when they walk through the door. If this is a problem to you, how I recommend remedying this situation is to ask the dog to sit instead of jumping. This is what is referred to as an incompatible behavior. Now, first things first, if you only try this when you walk in the door, and don’t do any practice runs of it, it’ll probably take a while to work. If you go out of your house a couple times a day, and then return and ask your dog to sit, it’ll help him understand what you want when you do it the “real” time. Use food rewards to encourage him to sit in the future. It’ll also be a good idea to have some treats at the ready when you do actually come in on the “real” ones. Stay patient with this, it will take lots of repetition. In the long run, you will not need treats for this, as your attention in this situation is what the dog is after and will serve as the reward.

Another game I like to play that helps dogs understand that we want them to sit instead of jump consists of teaching and “auto-sit.” To teach this, I grab a treat and show it to the dog. I then walk to a spot in the room and turn towards the dog. The dog comes up to me and usually tries behaviors that have worked in the past. (Jumping, pawing, barking, etc.) I patiently wait for the dog to offer a sit. Once he sits, I give him a piece of the treat and then I move to another spot and start over. As the dog starts doing well with this, I start moving a little faster to cause a little more excitement. The idea with this is to get the dog in the habit of walking up and sitting in front of people, instead of jumping on them.

Lastly, one other game that can be played is called “4 on the Floor.”

This consists of tethering the dog to something sturdy. (Maybe the bottom of the couch) The dog being tethered gives you the ability to walk away without him following. Walking away when done correctly is a form of punishment. As soon as the dog takes one paw off the ground, you want to walk away. (You can use this for play biting too.) When you’re hanging out with him you’ll want to give him lots of attention and even food or toy rewards for not jumping. As soon as he jumps, walk away. This is something you’ll want to do for a couple weeks. (Even when the jumping has stopped with you when doing the game.) By continuing you’ll be continue to reinforce the good behaviors.

If your dog is jumping on you while you have one of his toys or are holding on to something here’s a video to help with that:

[youtube id=”b6cuArL4JHA”]

Stopping Your Dog From Jumping on Others:

A leash is an extremely important tool to use when trying to get your dog to stop jumping on others. The leash is a tool that allows you to remove him from his reward. (The person) when he does in the incorrect behavior. (Jumping) Here’s how I use it:

The first thing I do is teach the dog to walk up and sit in front of a person. I refer to this as “Go Say Hi.” (Reference video for visual) I practice this cue with people in the house, and with anybody that is willing. As you can see in the video, the dog is cued to “go say hi” and is brought up on leash to the guest. The goal is for the dog to go up and sit so it can greet the guest. If he does, he can get what he wants which is the attention. If he jumps, use the leash to bring him back to the starting point for a couple seconds. Repeat this process until the dog successfully sitting instead of jumping. If the dog is struggling, give him longer breaks in between attempts. (A couple minutes.) During those breaks you can either hold onto him by his leash, or put him away. (Crate, baby gate etc.)

Here is the video:

[youtube id=”tVWYCrWuLGs”]

Be very strict with this process. It isn’t the easiest thing to accomplish, but with lots of consistency you’ll have a dog that doesn’t jump on guests coming in the door. Also, don’t allow people to say that jumping on them is okay. This is going to confuse your dog and cause the jumping to continue. If the situation comes up, tell the person your dog needs to sit for greetings. If they can’t respect that, they lose their opportunity to pet your dog.

In conclusion, to stop unwanted jumping you need to be very consistent. Don’t allow your dog to jump on guests sometimes. Don’t allow guests to say, “it’s okay, he can jump on me.” Don’t allow the dog to jump on you sometimes. Always ask the dog to do a more appropriate behavior like sitting. If you stay strict, you’ll accomplish your goal. If you get lax, you’ll probably have a dog that jumps for a lot longer than you’d like.

7

Is onion bad for dogs?

We all feed our dog table scraps and human treats and we know we shouldn’t. It’s so hard to resist that lovable face pleading for you to share your goodies. Most pet owners know of the harms of chocolate, but many other foods can cause harm to one’s precious pooch. There is growing concern in the dog community about which foods are harmful, and how much damage a given food can cause. After talking to my friends about what foods are bad for dogs, we all came to the same realization – that we didn’t know how bad onions are for our dogs. This article primarily looks at The Not-So-Innocent Onion and other members of the Allium family. After reading this article, I hope you will have a better understanding of how badly these little delights affect our dogs.

Now you’re thinking, why would my dog eat onions? The answer is, dogs will take anything you give to them as long as it smells good and taste good…. to them. He will sneak a piece of yummy pizza. Might be attracted to that potato salad or dip sitting on the picnic blanket. The smell of a hamburger can be irresistible. You might leave the remains of a bowl with leftover stew for your buddy to lick clean. And the draw to dig up the leeks in the vegetable garden can be overwhelming for some. There are many reasons why a dog will consume this little devil. Chives, shallots, green onions, onions, leeks, and garlic are all included in the Allium family.

It’s hard to tell what a pooch has gotten into. They can’t talk and probably won’t want to tell you what they have gotten into anyway. They’re dogs; they like that kind of stuff! Their symptoms might simply be a sour stomach causing vomiting after eating sticks and grass! Needless to say, if your dog is showing any of these signs and symptoms, take him to the vet as soon as possible. I know these are general symptoms your dog may display, but it’s best to err on the side of caution and not risk severe illness or death.

Just as with humans, onions can cause a multitude of problems in animals. Gas and bloating are our least worries. Dogs’ symptoms can range from a mild reaction such as an upset stomach, to more severe reactions such as liver toxicity or death. Surprisingly, it really doesn’t matter if your dog ingests raw or cooked onions; even dehydrated or powdered onions such as in soup mixes can cause harm. It all depends on how sensitive your dog is to the Allium family.

Similar to human allergic reaction with eating peanuts, some dogs can have more sensitivity than others. A general rule is a dog that ingests 5-15 grams / kilogram is at risk for a toxic reaction; it’s less for cats. Basically, that is 0.5% of their body weight which can be the tiniest diced portion known to man. Garlic is 5 times more powerful than onions, so Fido would need less to initiate a reaction. A mild reaction can go unnoticed, with only a few red blood cells being lysed (damaged). A moderate reaction might leave a dog lightheaded or lethargic, which might easily go unnoticed by the owner. But with a severe reaction, your dog can show signs and symptoms of vomiting, diarrhea, heavy panting, and jaundice (yellow coloring to the gums and eyes). The jaundice occurs due to liver damage and may take several days to develop. The cause of all the trouble is found in the onion flesh called Thiosulfate. Once the onion is eaten, thiosulfate breaks down to organosulfur in the GI tract. Your precious pooch does not have the enzymes to digest this compound.

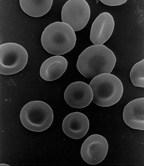
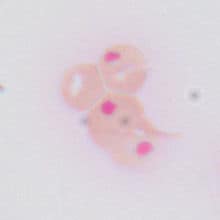
Now organosulfur reaches the red blood cells and oxidizes hemoglobin component. As we all know from school, the hemoglobin molecule carries much needed oxygen to every cell. Once oxidized, clumping exists and makes oxygen molecules unable to transfer across to vital cells. Under a microscope, this looks like tiny purple clumps…. the tell tale sign of onion toxicity. This is the most severe reaction: Heinz Body Anemia.

Redbloodcells
(Normal red blood cell)

220px-Heinz_bodies_cat
(Heinz Body Anemia, 3 distinct clumps)

You can diagnose this by looking at his gums and mucous membranes. No oxygen, no color! The gums will instead be pale. The dog will also have dark or reddish brown colored urine due to the elimination of these damaged red blood cells, and a rapid heart beat due to increased demand for oxygen to starved cells. Sudden onset of weakness, fatigue, and lack of interest in food can follow.

Deb LaPaugh, of La Paw Animal Hospital (yes, that’s her name! Fitting for a veterinarian) is concerned about an animal that looks jaundiced, shows signs of weakness, and is peeing blood. She mentions if a dog comes into the vet with these symptoms, the usual course of action will be blood work and a physical examination. A CBC (complete blood count) can reveal the severity of any loss of hemoglobin and a blood smear to show the clumped red blood cell. The dog would be placed on supportive care such as giving IV fluids and keeping the dog over night in the hospital for observation. From here the vet can determine if more drastic measures need to be taken.

Early stages of onion toxicity can be treated easily with supportive care and detoxification such as special vitamin C mixture to help counteract the poison. The later stages would include additional treatment such as supplemental oxygen and blood transfusions. The dog would then be monitored for several more days. Deb LaPaugh states she has seen cases where the dog has stayed hospitalized for over one month.

Onions can have costly consequences, but your furry friend will most likely recover from his misfortune. Next time reconsider feeding your dog extra goodies form the table. I would rather have a skinny healthy dog than a fat sick one. In the future we will look at other foods that might cause a potential reaction.

References:
1 gm = 0.06 teaspoons
1 lb = 0.45 kilograms
http://en.wikipedia.org/wiki/Red_blood_cell
http://en.wikipedia.org/wiki/Heinz_body
Deb LaPaugh, VMD. La Paw Animal Hospital, Bend Oregon. 4-18-15

The Dopamine Response

The regulation of dopamine plays an important role in mental and physical health. Dopamine is a catecholamine that acts as a hormone; you might know another as epinephrine or adrenaline. Catecholamines are released during stress. Stress can be a simple process of trying to learn a new task. Dopamine acts as a response to the Sympathetic Nervous System. The SNS increases heart rate, dilates eyes, and increases excitability. This is done is a certain area of the brain called the Limbic system.

The Limbic system houses the Hypothalamus, Hippocampus and Amygdala which controls reward/ pleasure, emotions, motivation and some motor movement. The release of this hormone comes from the Hypothalamus. The Hippocampus contributes to its learning process. While the Amygdala primary role is in emotional learning and fear conditioning. If that’s not confusing enough, another way of looking at this process is the neurotransmitter or chemical messenger (dopamine) sends a signal across a nerve cell to help to control certain function of the brain.

When a dog is stimulated with a pleasurable thing dopamine is released. This release creates a desire to keep doing this behavior, just like in Pavlov’s classical conditioning where he trained his dogs by ringing a bell and feeding multiple times. He noticed the dogs starting to salivate with just the ringing of a bell. The bell signaled a release of dopamine in anticipation of a pleasurable thing.

Here is a personal example of the dopamine response. I’ve been taking my Mcnabb to learn how to herd sheep. No food is used during any of the lesson. At first, she didn’t understand her duties to herd, but with praise she began to figure it out. I saw her ears go up and tail start to wag after each verbal reward. Now when I drive into the lot she starts crying with excitement. The response to dopamine is creating a pleasurable experience for her and sheep herding.

I don’t recommend praise rewarding on a young puppy. My dog is six and understands verbal cueing such as “yes” and “good girl” as a reward.

This process of positive training is much quicker compared to other training method like negative reinforcement or dominance training ie: collar pull when training a dog to heel. Most dogs will resist, thus creating more anxiety and fear. And in turn, the dog doesn’t learn this to be a positive experience. The best approach to dog training is to stimulate the dog’s pleasure center rather than take the negative non-dopamine route.

13

How To Stop Your Dog From Barking

Dogs bark. Yes, this is a pretty obvious statement to start off with, but I feel it’s important to point out. This is something that dogs do. I am going to be talking about different ways to curb some of the barking, but always remember that this is a trait of the domesticated dog.

Why Do Dogs Bark?

There are a couple reasons why dogs bark. In a lot of cases a dog is barking because it either wants something to get closer, or something to get further away.

Here are some other reasons:

  • Attention seeking. (Give me attention! Give me a treat!)
  • Startle response. (Random noises)
  • Boredom (Lack of exercise)
  • Excitement (Someone coming in the door)
  • Frustration (Not understanding what you’re asking)
  • Anxiety   (Separation anxiety)
  • Fear

As I’ve listed, there are many reasons why dogs bark. The first thing you need to do to help curb the unwanted barking is to identify what the reasoning is for why it’s happening. Depending on the reasoning, there will be different approaches on how to handle it.

In most cases Positive Reinforcement takes place when the dog barks, which results in more barking. Positive Reinforcement (R+) is when the dog does a behavior, and the behavior gets the dog something it wants. When R+ takes place, the behavior is very likely to repeat. Also, when R+ takes place over and over for that behavior, the behavior often gets stronger and stronger.

How to Stop Your Dog From Barking (Or from Unwanted Barking)

One of the most important things to do to help curb that unwanted barking is to make sure the dog gets zero enjoyment for the behavior. As I mentioned above, if your dog does the barking and gets what he wants, he will do it again. If he does the barking, and it results in nothing good, the behavior should start to go away on its own. If your dog is barking at you for a treat, and you do not give him a treat, the barking will stop. (It may take some time if the behavior has had a reinforcement history in the past.) If your dog is barking to get someone to go away, and the person doesn’t leave, the dog will learn that barking doesn’t work, and in theory, the barking will stop. If the barking is to get the person to come to them, and the person waits for the barking to stop until coming to the dog, the dog will learn that barking doesn’t make the person come, and actually being quiet will make the person come. These are just a couple examples. The overall idea though is to teach the dog that barking isn’t the answer.

Here are some other ways to get barking to stop:

  • Put the bark on cue.
  • Develop a “quiet” cue.
  • Reinforce incompatible behaviors.
  • Increase exercise (physical and mental)
  • Prevention / Management  (blocking  windows)

Put the Bark on Cue

While this may sound a little silly at first, if you put the bark on cue, and are very strict with it, the theory behind it is the dog won’t do it unless it’s cued. To teach this you need to find a way to get your dog to bark. For some dogs knocking on the door will trigger a bark. What you’d want to do is knock, the dog would bark, mark the behavior verbally or with a clicker and then reward. Do multiple reps of that. Once your dog is responding pretty well to that, you can start using a verbal cue prior to knocking, mark and reward. You’d then want to fade out the knocking and your dog would do the behavior as you cue it. (This probably isn’t going to work for most people, but it is an option.)

Develop a “Quiet” Cue

This is one that I use quite often. The way I teach this may seem a little counterproductive to start, but it works well in the long run. Here’s how I do it: When the dog is barking, I walk up and say, “quiet” and then present a treat. The dog typically quiets down long enough to just take the treat and then go right back to barking. Do lots of reps of this. I want the dog to start to associate the word “quiet” with getting a treat. After you do enough reps, when your dog is barking, you’ll be able to say, “quiet” and your dog will stop barking and look at you in anticipation of getting that treat. This is the behavior we are looking for. Once your dog responds to the quiet cue, you then want to start asking your dog to be quiet for longer periods before giving the treat. The overall goal is to be able to say, “quiet” and have your dog stop barking. You’ll need to do lots of repetition with lots of reinforcement to make this work.

Reinforce Incompatible Behaviors

An incompatible behavior is a basically getting your dog to do something that he can’t physically do while barking. An example is that the dog can’t quietly look at the thing it was barking at, and bark at the thing at the same time. These are incompatible behaviors. One thing I like to do is teach the dog to look at the thing without barking. Here is a video I made explaining this:

Increase Physical and Mental Stimulation

A lot of barking happens because the dog is bored. The dog is bored because he has extra energy and doesn’t have a way to exert it. It is said that 10 minutes of mental stimulation is equivalent to about 30 minutes of physical exercise. I’m a big fan of mental stimulation because it tires the dog out and also doesn’t build the dog’s stamina. Here are some forms of mental stimulation you can do with your dog:

  • Teach him to use his nose!
  • Make him work for his food or treats!
  • Teach him some tricks!

  • You can also work on regular manners / obedience training.

Prevent and Manage

This basically means that you’re preventing your dog from doing the unwanted behavior while you’re not present.

  • If barking out of the window is the problem, you’d want to either utilize a crate, or block the windows while you aren’t there.
  • If your dog is barking while it is outside, either be out there with him, or don’t let him outside by himself.
  • If your dog is barking because he’s frustrated, lower the criteria.

The things I’ve mentioned above are some ways to help you achieve your goal of less barking. If you are dealing with fear or anxiety that takes a bit more work than what I mentioned above. Give some of the ideas a try to get your dog’s barking to decrease. Be very consistent and give lots of reinforcement.

2

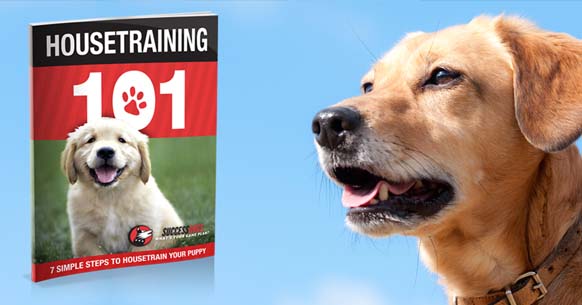
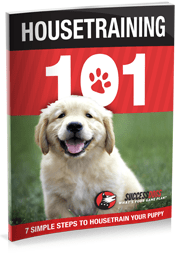
Free Puppy House Training eBook – Housetraining 101

Did you just get a puppy? Or do you need help house training or potty training your puppy?

Then good news!

We’ve just released our new Housetraining 101 eBook that will guide you through the 7 simple steps to easily housetrain your puppy.

These are the same 7 simple steps that we use here at Success Dogs to housetrain our own puppies, so we can vouch for its effectiveness.

You’ll discover inside the eBook…

Step #1: Rewarding the good choice – Since your puppy has literally no idea what you want, you will need to use rewards as a way of communicating where you want your puppy to eliminate.

Step #2: Catching your puppy in the act – Did you know that your puppy only learns in the present moment? By catching your puppy in the act, you’ll be teaching him that eliminating inside your home is not something you want.

Step #3: Supervision is key – How do you prevent your puppy from eliminating inside your home when you leave for work? You’ll find the answer in this chapter.

Step #4: Look for signs that your puppy has to go – Puppies will always give out signals that they need to go eliminate. Your job as a pet parent is to become aware of these and avoid accidents inside your home.

Step #5: Building a pattern – The objective of the previous four steps is to teach your puppy that eliminating outside will bring lots of joy, while eliminating inside produces nothing. This becomes a no-brainer for your puppy.

Step #6: Asking for the door – Wouldn’t it be nice if your puppy asked for the door to go outside and eliminate? We’ll show you how to teach this important skill.

Step #7: Conditioning a cue – Did you know that you can train your puppy to eliminate on command? This is extremely useful, especially when you’re going to the groomer, at an agility trial, or just in a rush.

Why is this eBook free?

Because when my family got our first dog, we had no idea how to housetrain him… And we ended up listening to other people’s incorrect advice, which only led to our dog loosing trust in us.

I don’t want this to happen to your or to your puppy, I want more for you. In fact, I want you to begin training your puppy using positive, reward-based and force-free methods. Which is what’s inside this short eBook.

free-housetraining-101-ebook

[optin_box style=”2″ alignment=”center” action=”https://forms.ontraport.com/v2.4/form_processor.php?” method=”post” email_field=”email” email_default=”Enter your email address” integration_type=”custom” double_optin=”Y” name_field=”firstname” name_required=”Y” name_default=”Enter your first name” opm_packages=””][optin_box_hidden][/optin_box_hidden][optin_box_code]

[/optin_box_code][optin_box_field name=”headline”]Get This House Training eBook
(a $27 value yours free!)[/optin_box_field][optin_box_field name=”paragraph”]PHA+RW50ZXIgeW91ciBpbmZvcm1hdGlvbiBiZWxvdyB0byBjbGFpbSB5b3VyIGZyZWUgY29weS48L3A+Cg==[/optin_box_field][optin_box_field name=”privacy”]Your information will never be shared with anyone.[/optin_box_field][optin_box_field name=”top_color”]undefined[/optin_box_field][optin_box_button type=”0″ button_below=”Y”]Send Me The eBook![/optin_box_button] [/optin_box]

Feel free to share this free house training eBook with your dog loving friends. The more we spread the word about positive, reward-based and force-free methods, the happier dogs will become!

3

Can dogs and cats get along?

Let’s face it: getting along with one another is tough. We’ve all seen it: cats fighting dogs, cats fighting humans, cats fighting other cats. All of this disrupts the peace of the household. The Perfect Paws Web site describes dogs as social creatures and cats as independent, solitary creatures.¹

However, cats do tend to live in groups. In observing my own animal family (two cats and two dogs), I have seen that this is true! The obstacle to the animals’ getting along lies in the two animals’ dispositions. Understanding each animal’s needs and instincts—and working within them—will allow for a more respectful relationship between cats and dogs.

Introducing a cat and a dog to each other takes gentleness and patience on the part of the owner. Most dogs and cats will take a few days to become acquainted with one another’s scents. The owner can facilitate this process by placing the cat in the dog’s area, making sure the dog is elsewhere. The cat can then sniff around the room, undisturbed, to familiarize itself with a prospective roommate. For the same purpose, place the dog in the cat’s area while the cat is away. After several opportunities to become accustomed to each other’s scent, invite the two animals into the same area.

The first encounter is an important one; setting up the right conditions will result in a more peaceable future for the animals. It’s a good idea to exercise your dog to get him tired prior to this first meeting and to trim your cat’s nails. Praise your dog; give him treats for being a good dog. Redirect him at the slightest sign of his intent to lunge at the cat. Correct his behavior with a positive approach or vocal tone so that the association is a pleasant one. Show your cat an escape route or safe place to hide, preferably up high, out of the dog’s reach. Praise your cat’s good behavior too. It only takes a second for a bad experience to occur, so watch for signs of stress, and separate the animals before an incident starts.

Supervision is needed when placing your cat and dog in the same room together for the first time. Let them see and smell each other for a few minutes, and then separate them from each other. Your cat might hiss and bat at your dog to set distance boundaries. Watch your two pets interact as you increase their time spent together.

Allow this to happen naturally, but watch for excessive signs of stress in both animals. A little stress is good. Hair will stand up, and cats will arch their back, turning sideways (both animals instinctively make themselves bigger). The animals’ eyes will dilate with excitement, and they will stare intently. The tail is a good indicator of whether the meeting is going well (tail up means assertive, tail between legs means afraid, tail in neutral position means relaxed). Dogs tend to become aggressive and exhibit predatory behavior when they are highly excited or stressed. Cats tend to mark their territory with urine, excessively groom themselves, hide, or display aggressive behavior.²

Your dog and cat need to make friends with each other on their own with as little intervention as possible from you. In this fashion, they will learn to respect each other. Watch them play. The dog will jump around and perform a play bow (elbows on the ground and back legs up). Cats will pounce and box. This play should be done in a gentle manner and equally by both players. If for any reason it doesn’t feel right, end the session, and try again later.

Keep in mind the animals’ dispositions and personalities. Some animals have a strong prey drive, some will tolerate each other, and some will become best buds! I can’t stress enough the importance of a slow transition and of lengthening the time of supervised visits until you can finally leave the animals alone together.

Either way, you can help your family pets build a relationship that results in household harmony.

References:
1. http://www.perfectpaws.com/help2.html
2. http://www.aspca.org/pet-care/virtual-pet behavior/introducing-your-cat-new-dog

9

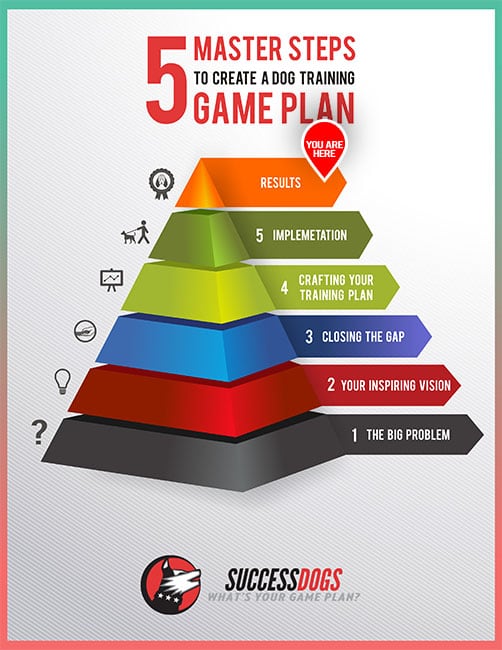
Five Master Steps To Create A Dog Training Game Plan

In this post, I’m going to walk you through exactly what we do here at Success Dogs to create a dog training game plan to solve any dog training problem. This is the same process that I use to create our online dog training programs or when I work with a dog one-on-one.

Before we dive in, you might be wondering what a game plan is. A game plan is our term for an outlined strategy to solve a particular problem or to teach a dog a particular skill.

Think of a sport: Coaches have to come up with a winning strategy before they step a foot onto the field. They have to create a plan that they believe will bring them to victory.

We approach dog training the same way—with an end result in mind. Then we create a training plan that adheres to our guiding principles.

Let’s get started!

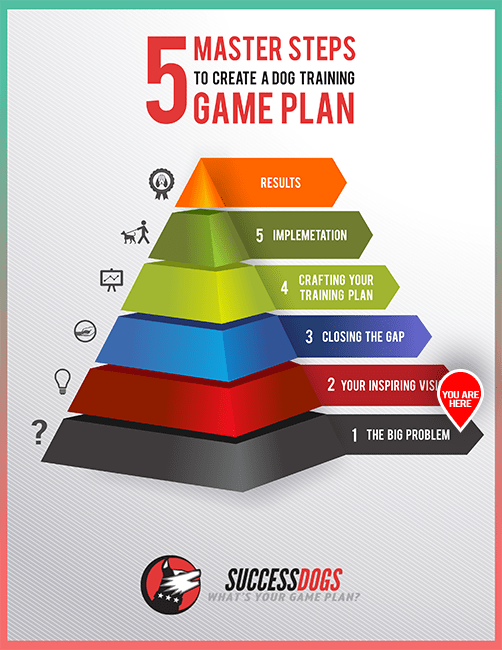
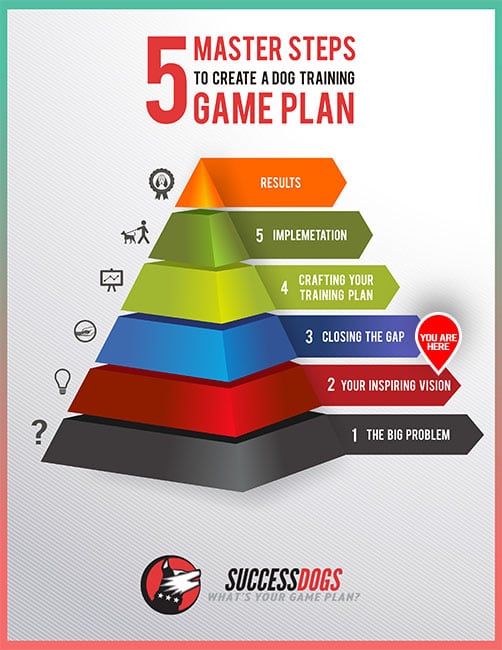
MASTER STEP 1: THE BIG PROBLEM
success_dogs_5-master-steps_the_big_problem

The first thing that you need to do is identify what the big problem is. And by big problem, I mean whatever you want to solve with your dog.

Maybe it’s peeing on the carpet, not coming when called, or pulling on the leash. Whatever it is, you have to be clear about solving one specific problem.

Oftentimes when a dog owner asks me to help train their dog, the owner will tell me how their dog has many problems and will want me to create a training plan to solve all of them. And I have to tell the owner that it’s better to focus on solving one problem at a time than to try tackling four or five problems and end up becoming overwhelmed and frustrated.

So right now, think about one specific problem with your dog, and dedicate the remainder of this guide to solving it.

To help you understand how I go about creating a training game plan, I will go through the process as if I’m working with a dog that pulls on the leash. I recently worked with a dog that had this problem, so it’s fresh in my mind.

YOUR ASSIGNMENT: Write down one problem with your dog that you are dedicated to solving.

MASTER STEP 2: YOUR INSPIRING VISION
infographic 4_jean

Once you know exactly which problem you want to change, it’s time to move on to the next step, which is to create an inspiring vision.

This is what you want your dog to become, or how you would like it to be if your dog didn’t have the particular problem. Really think about this. The clearer you are about what it is that you want, the more likely you will be to attain it.

It’s not enough to go from “my dog is digging in the backyard” to “I want my dog to not dig in the backyard.” That isn’t going to motivate anybody, and to be totally honest with you, you’re going to need to take some action to solve your dog’s problem. There’s just no way around that.

You need to create an inspiring vision so you are pulled forward toward change rather than having to force yourself to take action.

I’ve been to dozens of self-help seminars, including all of Tony Robbins’ seminars, and what they all have in common is that you have to create in your mind a clear picture of what you want—something that emotionally inspires you.

So think about your vision and add emotion to it. How would you feel if your dog never had this problem again? How much stress would that eliminate? How much happier would you be? And how would your relationship with your dog grow as a result? Would you feel closer to your dog? Would you enjoy your dog’s company more?

Step into this vision and feel like it’s happening today. How do you feel?

ASSIGNMENT: Write down in your own words a vision of your dog that inspires you.

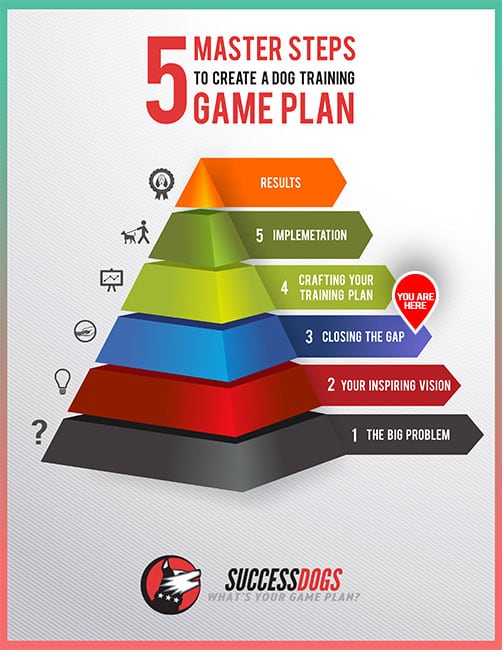
MASTER STEP 3: CLOSING THE GAP
infographic 4_jean

When you think about the problem you have with your dog and your inspiring vision, there’s an obvious gap between the two. This stage is about figuring out ways to close this gap.

First, let’s analyze the problem in a little bit more depth. The more you know about it, the easier it’s going to be to craft your training game plan.

Ask yourself the following three questions:

#1: When does this problem occur?
#2: What triggers the problem to occur?
#3: Is there more than one trigger?

Your answers to these questions will give you a great deal of clarity. For example, when I answered them for a dog that was pulling on the leash, I figured out that she would pull mainly when she wanted to get to something, whether that was a leaf blowing, grass on the ground, or an exciting smell coming from an object. She didn’t really “pull all the time,” as her owner described the behavior to me.

From those answers, you should be able to come up with a list of one or two focus areas that you need to work on with your dog.

For example, if the dog lunges at a blowing leaf, I need to develop the dog’s self-control skills—that’s one focus area. And if the dog strains at the end of the leash, I need to build that dog’s attention skills—that’s a second focus area.

You always want to think in terms of improving your dog’s particular skill or ability. This will keep you from falling into the punishment trap, in which you punish your dog for not doing what you want.

ASSIGNMENT: Write down one or two focus areas that you’ll commit to improving.

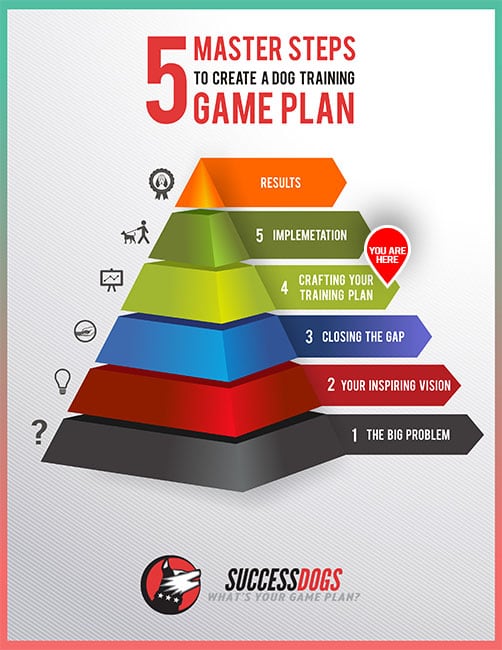
MASTER STEP 4: CRAFTING YOUR TRAINING PLAN
infographic 4_jean

Do you see the magic in what we’ve done so far? Instead of having one giant and overwhelming problem that you’re trying to solve, you can instead focus solely on one or two areas. This completely changes the way that you’re going to go about training.

In this stage, the objective is to create action steps that you can implement with your dog on a daily basis. You’ll need to take each of your focus areas and brainstorm ways to improve them, while making sure that they are both achievable and incremental.

What I mean is that you must always set your dog up for success, and each step should build upon the previous one so that the focus area gradually improves.

To give you an example, here are my lists of action items for both areas of focus:

Self-Control:

  • Ignore a dog treat in my hand (indoors)
  • Ignore a dog treat on the floor (indoors)
  • Ignore human food on the table (indoors)
  • Ignore human food on the floor (indoors)
  • Ignore a whole bag of popcorn on the floor (indoors)
  • Ignore a rock on the ground (outside)
  • Ignore a paper cup on the ground (outside)
  • Ignore an opened bag of chips on the ground (outside)
  • Ignore a leaf on the ground (outside)
  • Ignore a blowing leaf on the ground (outside)

Attention:

  • Touch my hand (indoors)
  • Touch my hand at my side (indoors)
  • Touch my hand while walking (indoors)
  • Touch my hand while turning directions (indoors)
  • Touch my hand while ignoring a dog treat on the floor (indoors)
  • Touch my hand (outside)
  • Touch my hand while walking (outside)
  • Touch my hand while walking on the grass (outside)
  • Touch my hand while ignoring a paper cup on the ground (outside)
  • Touch my hand while ignoring a blowing leaf (outside)

As you can see, some of these action items from both focus areas overlap. And that’s okay, but can you see how the focus is on developing the skill rather than on stopping the problem?

ASSIGNMENT: Write at least ten action items for each focus area. Don’t try to make this perfect—just brainstorm, and you can always revise the list later.

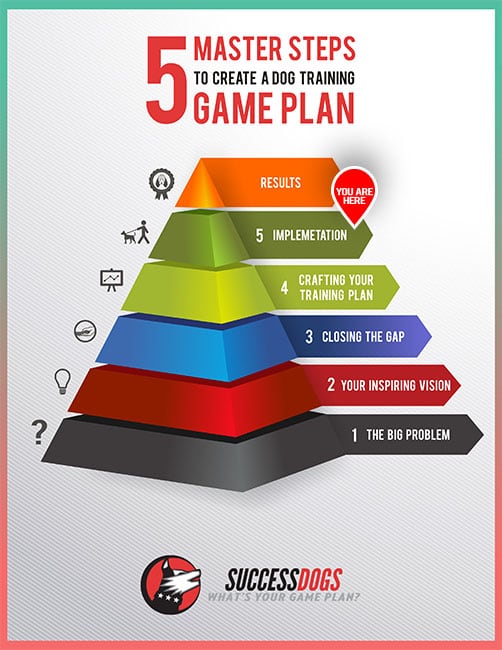
MASTER STEP 5: IMPLEMENTATION
infographic 4_jean

Once you’ve created your training plan, the only thing left to do is to implement it with your dog.

From my experience in training dogs, there’s nothing like the power of scheduling. I know that this isn’t attractive, but if you write down on your calendar which days you’re committed to training your dog and for how long, you’ll be much more likely to follow through.

I know that you’re busy. You work long hours, and you really don’t feel like training your dog after a long and busy day at work. I get it. But what if you only committed to implementing this training plan for a week, two weeks, or a month? That’s a very small fraction of your dog’s life and could make a huge difference.

Do you remember your inspiring vision? This is what’s going to motivate you to take action and take the time to train your dog.

How often and how long you should train your dog is totally dependent on what the problem is and how much time you have. I highly recommend keeping your training sessions short (about fifteen to twenty minutes)—shorter if you are working on an intricate behavior.

The minimum that you should train your dog is once a day. You won’t get the results that you want if you skip days or train your dog only once a week. And if you want even faster results, you can train several times per day, say in the morning, afternoon, and evening.

ASSIGNMENT: Schedule your next three training sessions with your dog. They can happen all during one day or be spread out over three days.

RESULTS
infographic 4_jean

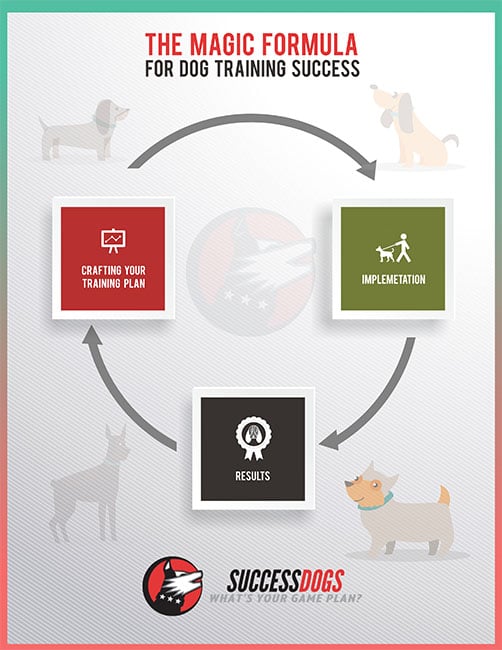
Once you implement the training plan with your dog, you will notice results. And if these results are not exactly what you’re looking for, that’s okay. You may have to change something in your training plan.

This is exactly what I do with every dog that I work with. First, I implement the training plan that I created. If the action item inside the training plan doesn’t work, I simply go back to the drawing board and make a change. I then try again, and do this over and over until I succeed.

This is the magic formula for dog training success.

infographic 2

CONCLUSION

This is the exact process that I use to train any dog, regardless of the problem. And now, you can use it with your own dog.

If you would like to see exactly how I worked with the dog that pulled on the leash, I recorded all of my training sessions and created a course called The Walk in Harmony Game Plan. Inside, you can see exactly which skills I developed and how, as well as all of the different action items that I implemented to get what her owner wanted, a dog that walked nicely on a loose leash.

How To Train A Dog To Stand On Its Hind Legs

Not too long ago I was looking at videos of show dogs. You know—those dogs that can do amazing things on talent shows. One trick in particular struck me as simply amazing. I saw a dog stand and walk on his hind legs, and I thought it was the coolest thing ever. So I decided to teach it to my dog. And it worked!

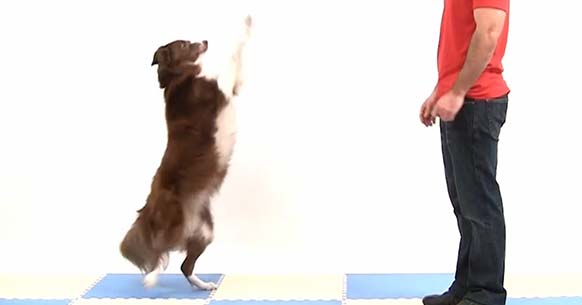
Here’s a video of how I did it, and it’s only four minutes long.

I have added some additional training information and tips below. Be sure to read them when you teach your dog this trick.

STAGE 1

Before you begin training your dog, it is important to note that standing tall on its hind legs is not a natural behavior for your dog. This is not going to be comfortable, especially if you have a larger dog. Smaller dogs usually have a much easier time with this trick.

I must also caution you that if you have any concern about your dog’s hips or hind legs, or if your dog has a history of injury in that area, then you should not attempt to train for this trick. Your dog’s health and well-being is much more important than a trick.

Let’s begin. The first thing is to teach your dog that great things will happen if it stands on its hind legs. That’s why you need to reward your dog when it moves into that position.

Begin by placing your dog in a sitting position, and then place a treat above your dog’s head. Next, you move your hand upward and toward your dog’s back. The goal is to get your dog’s front legs off the ground. As soon as this happens, reward your dog immediately. Continue to reward your dog while gradually moving the treat higher and higher.

The final goal is to get your dog to stand tall on the tip of its toes, as seen in the video. Make sure that your dog doesn’t put its paws on you when doing this trick; your dog should learn to balance itself without your help.

Practice this exercise at least twenty times. Your dog should be comfortable in this position before moving on.

STAGE 2

Once you can easily lure your dog into the stand tall position, the next step is to begin conditioning a hand signal. This step is to avoid having your dog become dependent on you holding a treat above its head to do the trick. You will be able to trigger this behavior from a distance, which looks much more impressive.

The easiest way to do this step is by creating a pattern (e.g., 3:1), which means three lures followed by one hand signal. This works great because it sets your dog up for success. Your dog will anticipate what you want it to do, and it will stand tall even though you don’t have a treat in your hand.

In the beginning, make your hand signals identical to your lure. Basically, this is the same motion as your lure but without any food inside. You can see more clearly what I mean in the video above.

Next, while ensuring that your dog is successful and being rewarded for every repetition, you can slowly make changes to your hand signal. Preferably, move your hand away from your dog and use your index finger pointing up as the hand signal.

The key here is to refine your hand signal to the degree of perfection you want before moving to stage three.

STAGES 3 & 4

Once you can consistently signal your dog to stand tall and you have refined your hand signal to the degree of perfection you want, you can begin conditioning a verbal command. Saying your verbal command just before you give your hand signal easily accomplishes this. However, it is important that you leave a small pause between the two so your dog learns that verbal commands are what trigger the hand signal.

A common mistake new trainers make is that they say their command at the same time they give their hand signal. You really must say “Stand,” and give your hand signal after. Practice this at least twenty times, and then start testing your dog’s understanding of the command.

You can test your dog’s understanding by creating a pattern in which you say your command (e.g., “Stand”) followed by a hand signal three times in a row. Then, on the fourth repetition you simply say “Stand” and see if your dog responds to your verbal command. If your dog responds, then great! Make sure that you celebrate with a treat and lots of praise.

However, if your dog does not respond, this usually means you need more conditioning with hand signals. Also, you might want to record your training sessions to see if you project any subtle body language that your dog might be picking up instead of your verbal command.

For example, a common mistake people make when training their dog to lie down is to say “Down” while nodding their head or looking down. Although this seems harmless, some dogs will learn to ignore the command and simply wait for the head movement. As you can imagine, this is problematic if the owner is not directly in front of the dog.

CONCLUSION

I am so happy you have decided to teach your dog this trick. I think you’re going to love it, especially once you see people’s reaction to it. Although it’s extremely simple to teach, people will think your dog is a genius.

Have fun with it!

NOTE: By the way, I have written an in-depth guide about the four stages of luring. Be sure to read it if you want to apply it to teaching your dog other behaviors and tricks. It’s available here.

5

How To Teach Your Dog To Roll Over

Since I published my core training concept, “The Four Stages of Luring,” many people have asked me to show them examples of how luring is done. And because a picture speaks a thousand words, I decided to dig into my collection of dog trick lessons to find one that uses this training method.

Then I stumbled upon my “Roll Over” lesson—the perfect match!

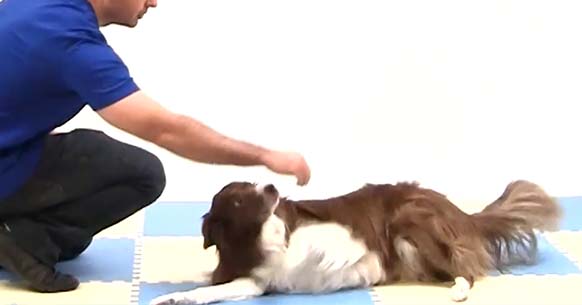
Here’s the video—it’s only about six minutes long and you’ll learn exactly how to teach your dog to roll over.

You will also find some additional information below about each stage so you can refer to it while teaching your dog this trick.

STAGE 1

The first thing you need to do is teach your dog the behavior of rolling over. Begin by luring your dog into a down position. This is accomplished by moving your lure close to the floor and between your dog’s paws. Be sure to release the treat and reward your dog once its belly touches the floor.

Then the next step will be to reward your dog for going onto its side. At this stage you move your lure close to your dog’s shoulder blade. Make sure you release the treat and reward your dog once it falls onto its side.

Continue to move your lure closer to your dog’s back until your dog rolls over. You may need to reward this step multiple times before your dog gets used to the sensation of rolling over. Depending on the size of your dog, you may need to create some momentum by quickly moving your lure toward your dog’s back.

This momentum, as demonstrated in the video, will get your dog’s body to follow through and roll over.

Please keep in mind that rolling over is not a natural behavior for dogs and can be a little bit scary for them. It’s also recommended that you practice this on a soft surface such as carpet or grass. This will make it more comfortable for your dog.

STAGE 2

Once you can easily lure your dog to roll over, the next logical step is to teach your dog to respond to a hand signal. You might be wondering why you need to teach a hand signal. The main reason is to keep your dog from becoming dependent on your having food in your hand to perform the behavior.

Begin by creating a pattern in which you lure your dog twice in a row for rolling over. On the third repetition, simply pretend you have a treat in your hand and do the same motion. This will fool your dog into following your hand even though you don’t have any food in it.

As you become successful at this, you can reduce the ratio of lures to hand signals until it is 1:1, meaning that you lure your dog once and then give a hand signal. Eventually, you will be able to entirely phase out the lures.

Then you can gradually make changes to your hand signal until your dog responds to the one that you want. For example, you can practice signaling your dog to roll over and, with every repetition, you can slowly stand.

STAGE 3 & 4

Did you notice that I didn’t give the command “Roll over” until this stage? The reason I didn’t is that dogs need to learn the behavior before it can be associated with a verbal command.

And because you’ve just taught your dog the behavior in the first two stages, the only thing left is to give your verbal command, “Roll over,” just before you give your hand signal.

Pretty easy, right?

The trick for this to work is repetition. You have to do it a good twenty to thirty times, preferably over a few training sessions. Then you’ll want to attempt Stage 4, which consists of saying your verbal command.

It’s also a good idea to create a pattern in which you give your verbal command “Roll over” two or three times in a row, and then test your dog’s understanding on the following repetition.

CONCLUSION

I must admit I have an affinity for this trick. It was one of the first tricks I taught my dog, and it gave me such a sense of confidence.

So have fun with it!

NOTE: And be sure to refer to this guide while you go through the different stages with your dog. There is also great additional information inside my core training concept, “The Four Stages of Luring.”

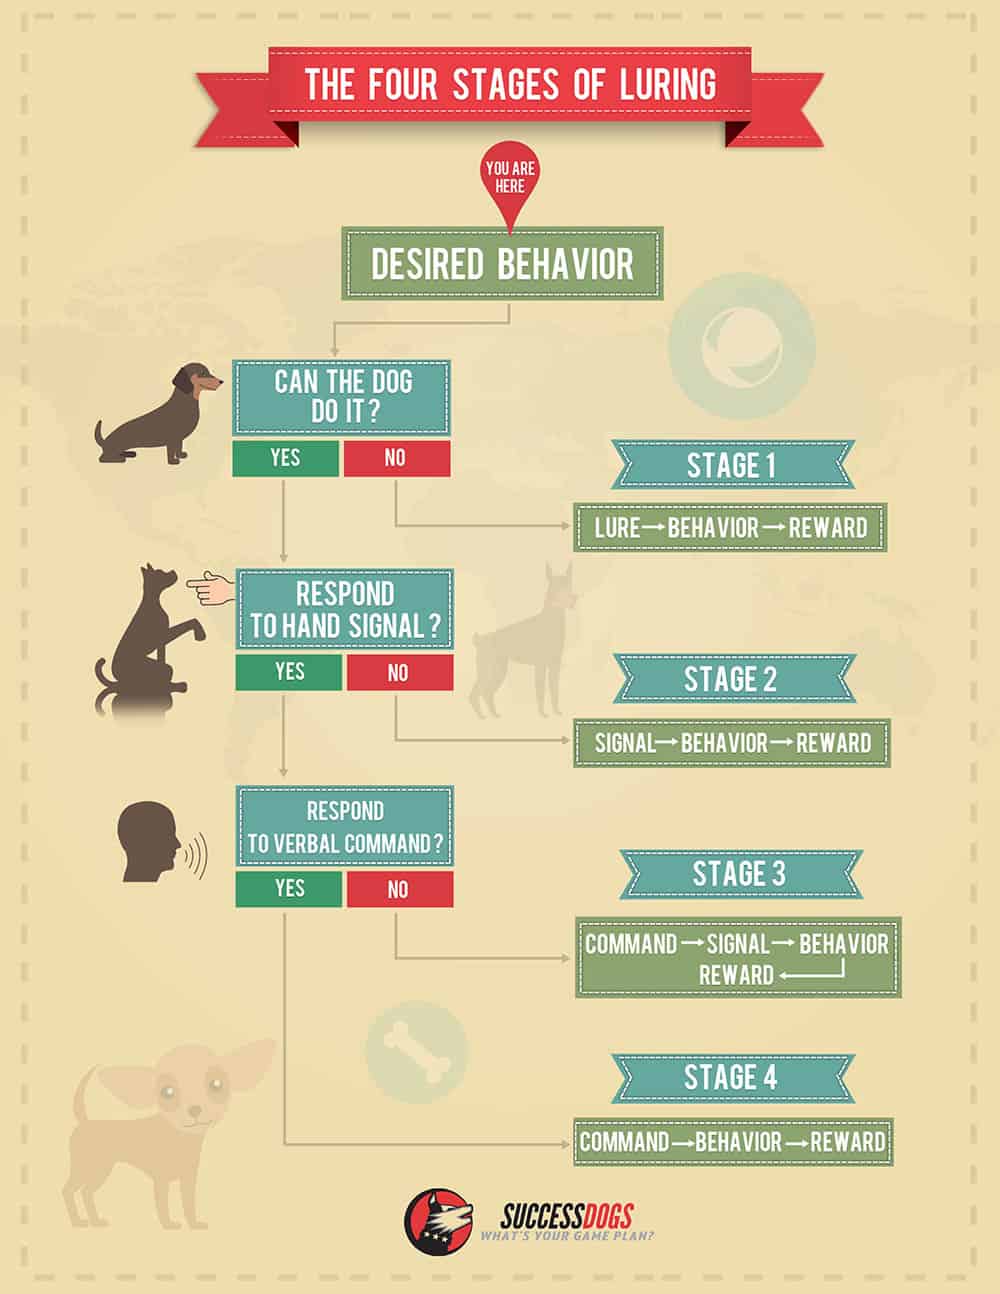
Dog Training Infographic Version 2 – The Four Stages of Luring

I published my long-awaited training concept about the four stages of luring a few days ago. You can learn more about how it works and how you can use it to train your dog on this page.

When I designed this infographic, I wanted two distinct versions. The first one was to be given to my students so that they can print it and refer to it while training their dog.

The other was to be a graphic-oriented infographic, where people could share it on social media sites such as Facebook and Twitter, or post it on their website.

Here is the second version:

(Click the photo to enlarge, and check out the sharing instructions at the bottom of this page.)

Dog Training Infographic - The Four Stages of Luring

Share this image on your site:

[infographic_share_1]

Share this image on social media:

[social_sharing style=”style-14″ fb_like_url=”https://www.successdogs.com/jeans-blog/dog-training-infographic-luring/” fb_color=”light” fb_lang=”en_GB” fb_text=”like” fb_button_text=”Share” tw_lang=”en” tw_url=”https://www.successdogs.com/jeans-blog/dog-training-infographic-luring/” tw_name=”successdogs” tw_button_text=”Share” g_url=”https://www.successdogs.com/jeans-blog/dog-training-infographic-luring/” g_lang=”en-GB” g_button_text=”Share” alignment=”center”]

If you would like to download the printer-friendly version, visit the four stages of luring training concept page.

>